Showing posts with label Kitchen Aid. Show all posts

Thursday, August 5, 2010

Treat of the Week for Work: Blackberry Pie Bars

Every berry has its day.
Well... most do. This little guy slid off the plate just as all the others were being poured into my lovely Kitchen Aid mixing bowl.
Yeah, I never get tired of saying that. My. Kitchen Aid. Mixer. Ah, it's like poetry. :)
So anyways, you'll be happy to learn that this recipe marks my first completed "section" from the bucket list! I've made all the Bars I had set to make as my goal. But don't think I'm getting off the hook THAT easy. I've still got some surprises up my sleeve... and since discovering my insane passion for bars, I just know these won't be the last ones to come out of my oven.


Blackberry Pie Bars
(with very little adaptation, from
Brown Eyed Baker)

Yield: 18 bars

Prep Time: 30 minutes | Bake Time: 55 minutes

For the Crust and Topping:
Zest of 2 lemons
1 cup granulated sugar
3 cups all-purpose flour
1 cup (2 sticks) unsalted butter + 1/2 cup salted butter, cubed and chilled
(I'm trying to get rid of the extra salted butter we accidentally bought a while ago!)

For the Blackberry Filling:
4 large eggs
2 cups granulated sugar
1 cup light sour cream
¾ cup all-purpose flour
Pinch of salt
2 16-ounce packages of frozen blackberries
(I'm sorry!! My wallet couldn't handle the cost for 8 small crates of Driscoll's $3.99 a package berries!)

1. Preheat the oven to 350 degrees F. Grease a 9×13-inch baking pan with butter; set aside.

2. In a small bowl, combine the granulated sugar and the lemon zest. Using your fingers, rub the zest into the sugar until all of the sugar has been moistened. In the bowl of a food processor, combine the lemon sugar, all-purpose flour and salt. Pulse a few times to combine. Add the butter and continue to pulse until the pieces of butter are no larger than the size of peas, about 10 to 12 pulses.

3. Measure out 1½ cups of the crumb mixture to use for the topping and put it in the refrigerator until needed. Press the remaining mixture into the bottom of the pan. Bake the crust until golden brown, about 15 to 20 minutes. Let cool for about 10 minutes while you prepare the filling.

4. To make the filling, whisk the eggs in a large bowl. Whisk in the sugar, sour cream, flour and salt until thoroughly combined. Gently fold in the blackberries. Spoon the mixture evenly over the crust and make sure all of the blackberries are in one layer and not sitting on top of one another.

5. Sprinkle the reserved crust mixture evenly over the filling. Bake until the top is lightly browned, about 45 to 55 minutes. Let cool for at least 1 hour before cutting.

Happy Baking!
Jessica

Sunday, July 11, 2010

Again again!

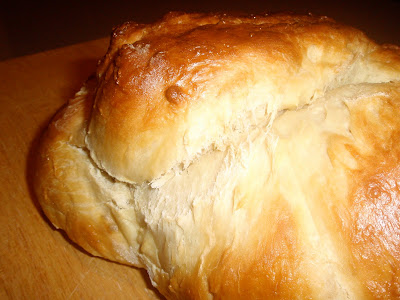
Oops.... I did it again. You played with my heart and I got lost in the game- and had to make challah again! ;)
Since I had a beautiful wedding in Monterey to attend this afternoon, I knew it was the perfect day to make a yeasty thing that could rise wonderfully overnight- and here it is! My love for challah will never fade, so here is another recipe for a perfect challah- 3 loaves even! And with my new Kitchen Aid it was really a pleasure to make- no sore arms!! :)
Challah
(adapted from Artisan Bread in Five Minutes a Day by Jeff Hertzberg and Zoe Francois)

  • 1 3/4 cups lukewarm water
  • 1 1/2 tablespoons granulated yeast (2 packets)
  • 1 1/4 tablespoons salt
  • 4 large eggs, lightly beaten
  • 1/2 cup liquid honey
  • 1/2 cup butter, melted
  • 7 cups unbleached all-purpose flour
  • Egg wash: 1 egg beaten + 1 tablespoon of water
Making the dough:
  1. Mix the yeast, salt, eggs, honey, and melted butter with the water in a large bowl or food container. The dough will stay in whatever vessel you use to mix it in, so make sure it is large enough to store the risen dough but small enough to fit comfortably in your refrigerator.
  2. Using a wooden spoon, mix in the flour. The flour must be completely incorporated so you can use an electric stand mixer if you have one with a big enough bowl. Other wise, stir until the flour is completely combined to create a sticky loose dough. You can use wet hands to incorporate the last of the dough if you need to.
  3. Cover your container and allow the dough to rest at room temperature until it rises and and falls back a bit, or becomes flat on top. Make sure when you cover the container that you leave it open a bit to let the gas created by the rising process to escape, I use a dish towel. :) The rising process will take about 2 hours.
  4. Once the dough has risen it can be used right away or can be placedin the refrigerator for future use. Due to the eggs in the recipe is should be used within 4 days. If you can not use it in that time, cut the dough into one pound pieces, about the size of a grapefruit, and freeze them in freezer safe bags for up to 4 weeks. Remove as much air as possible from the bag before placing in the freezer and defrost in the refrigerator overnight when you want to use one. (I made all the dough and divided it into 3 equal pieces)
Baking:
  1. Grease a cookie sheet or line it with parchment paper or a silicone mat. Position an oven rack to the centre of your oven. Lightly dust the surface of the dough in your container with flour and pull off a 1-pound piece. Using a little more flour on your hands, quickly shape the piece into a ball by stretching the surface of the dough around to the bottom.
  2. Divide the ball into three pieces and roll the pieces into a thin rope shape about 6-7 inches long. If the dough is hard to work with let it rest for 5 minutes and begin rolling again until you get the desired shape. Begin braiding the dough, starting at the centre and working your way out in one direction and then repeat the process on the other side. This will give your loaf a uniform thickness.
  3. Move the prepared loaf to your cookie sheet and allow it to rest for 1 hour and 20 minutes(or just 40 minutes if you're using fresh, unrefrigerated dough). The loaf will rise again during this time.
  4. Preheat your oven to 350-degrees about 15-20 minutes before it is time to bake. Adjust the time in accordance with how long it takes your oven to heat up. Brush the loaf with egg wash and sprinkle with poppy or sesame seeds, if you are using them.
  5. Bake for about 30 minutes or until your Challah is golden brown and springs back when lightly touched at the centre. The loaf should offer resistence when you press down lightly between the braids. Remove from the oven and place on a baking rack to cool before eating.
  6. And remember, Challah is traditionally pulled apart rather than sliced, so have at it with your hands! :)
Happy Baking!
Jessica