Wednesday, June 30, 2010

Fresh grown plums mean a Plum Tart!

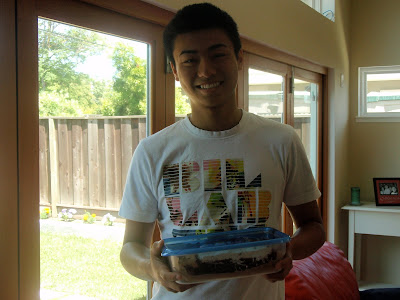
Yesterday, my brother came home with his arms full of fresh fruit! His very sweet girlfriend's parents gave us a HUGE tupperware-full of plums and a big ziploc-bag of lemons, yum!
After dinner, I was enjoying some of the delicious plums and my mom suggested I might consider making a plum tart from them- and after that seed was planted... Well, I knew I would need to try it out.
Thankfully, as I was looking at some of my favorite blogs, I found that Smitten Kitchen had a recipe for a Plum-Almond Tart that looked WAY too mouth-wateringly amazing to be allowed on the internet. So it was decided. :)
The tart took a bit of work to put together, but considering the multiple bakings and separate almond filling and fruit cutting, it was pretty simple! My favorite part was that the dough didn't require a long refrigeration time, just a quick 15 minutes in the freezer and directly into the preheated oven.

Plum-Almond Tart
(Originally from Bon Appetit Magazine)

Ingredients:

Crust
  • 1 cup all purpose flour
  • 1 tablespoon sugar
  • 1/8 teaspoon salt
  • 1/2 cup chilled unsalted butter, cut into 1/2 inch pieces
  • 2 tablespoons ice water
  • 1/4 teaspoon vanilla extract
Filling
  • 1/3 cup whole almonds (about 2 ounces)
  • 1/3 cup sugar
  • 1 large egg
  • 3 tablespoons unsalted butter, room temperature
  • 2 teaspoons Cassis Liquor
  • 12 ounces ripe red-skinned plums, pitted, cut into 3/4-inch thick wedges
Make crust:
  1. Preheat oven to 375 degrees F. Combine first 3 ingredients in processor. Using on/off turns, cut in butter until mixture resembles coarse meal. Mix 2 tablespoons ice water and vanilla in small bowl. Pour water mixture over dough. Process until moist clumps form.
  2. Gather dough into ball; flatten into disk. Roll out on floured surface to 12-inch round. Transfer to 9-inch diameter tart pan with removable bottom. Trim overhang to 1/2 inch. Fold overhang in and press, forming double-thick sides. Using fork, pierce dough all over. Freeze 15 minutes.
  3. Bake crust until pale golden, about 25 minutes. (In my oven) Cool on rack. Maintain oven temperature.
Make filling:
  1. Finely grind almonds with sugar in processor. Add egg, butter and 2 teaspoons Cassis Liquor. Process until batter forms. Pour filling into crust. Arrange plums atop filling. Bake until plums are tender and filling is golden and set, about 50 minutes.
  2. Cool tart and serve at room temperature.
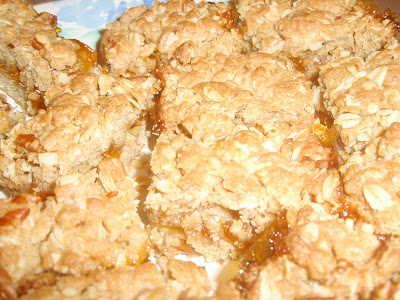
This tart showcased the homegrown plums perfectly, but don't just take my word for it! Give this beautiful tart a try!

Happy Baking!
Jessica

Tuesday, June 29, 2010

"Cinnabunzzies"

My brother doesn't tend to make many requests for desserts, even through this whole baking every day project, so when he exclaimed- literally exclaimed (!) that he knew what he'd like me to make for him, I just couldn't let him down.
And what he wanted, were Cinnamon Buns! Little did I know, they're actually somewhat challenging! Mostly because they use yeast and require a rising for about 2 hours and a proofing for 76-90 minutes after shaping them.
Sadly I don't have a lot of time to explain these at length, but thanks to Brown Eyed Baker, these were super simple and straightforward. They had just enough sugar within the pastry to be sweet but not heart-stopping, and the little bit of vanilla glaze dribbled on top made them a great dessert to be enjoyed after a really long day. :)

Cinnamon Buns
(From BrownEyedBaker and originally Peter Reinhart's The Bread Apprentice)
Yields 6 medium cinnamon buns

Ingredients:
  • 3 1/4 tablespoons granulated sugar
  • 1/2 teaspoon salt
  • 2 3/4 tablespoons unsalted butter
  • 1/2 large egg, beaten
  • 1/2 teaspoon lemon zest
  • 1 3/4 cups all-purpose flour
  • 1 teaspoon instant yeast
  • 5/8 cup buttermilk
  • Cinnamon Sugar: 1/4 cup granulated sugar plus 3/4 teaspoon ground cinnamon
Directions:
  1. Cream together the sugar, salt, and butter on medium-speed. Whip in the egg and lemon zest until smooth. Then add the flour, yeast and milk. Mix on low speed until the dough forms into a ball. Knead dough for about 12-15 minutes, or until silky and supple, tacky not sticky. You may have to add a little flour or water to this mixture to get the desired texture. Lightly oil a large bowl and transfer the dough to the bowl, rolling it around to coat it with oil. Cover the bowl with plastic wrap.
  2. Ferment at room temperature for approximately 2 hours, or until the dough doubles in size.
  3. Mist the counter with spray oil and transfer the dough to the counter.
  4. Shaping the buns: (A) Roll out the dough with a rolling pin, lightly dusting the top with flour to keep it from sticking to the pin. Roll it into a rectangle about 2/3 inch thick and 9 inches wide by 4-5 inches long. Don't roll out the dough too thin, or the finished buns will be tough and chewy rather than soft and plump. (B) Sprinkle the cinnamon sugar over the surface of the dough and (C) roll the dough up into a cigar-shaped log, creating a cinnamon-sugar spiral as you roll. With the seam side down, cut the dough into about 6 pieces each about 1 3/4 inches thick.
  5. Line a sheet pan with baking parchment. Place the buns approximately 1/2 inch apart so that they aren't touching but are close to one another.
  6. Proof at room temperature for 75 to 90 minutes, or until the pieces have doubled in size.
  7. Preheat the oven to 350 degrees F with the oven rack in the middle shelf.
  8. Bake the buns for 20-30 minutes or until golden brown. Cool the buns for about 10 minutes and then drizzle with white fondant glaze*.
*White fondant glaze: Sift 2 cups of powdered sugar into a bowl. Add 1/2 teaspoon of vanilla extract and 3 tablespoons of warm milk, briskly whisking until all the sugar has dissolved. Add the milk slowly and only as much as needed to make a thick, smooth paste.

Happy Baking!
Jessica

Monday, June 28, 2010

It took some time, but we made it through


Today, I had my first voice lesson (since I've moved back home for the summer) and I wanted to make something special for my teacher (and good friend) of 4 years. A while back, at one of her various recitals I learned that her favorite sweet was Lemon Bars- so I thought my mom's amazing recipe would be perfect.I know they require a blind bake for the crust and another baking with the lemony-custard poured on top, but knowing I would have about an hour and twenty minutes when I got home from work to get them done, I thought they would be perfect and still warm for me to bring to her.
Before

Unfortunately, this did not go as planned. I got back a few minutes late, all in a rush, and when I had gotten through the blind bake and everything else, I only just had the 15 minutes necessary to drive to her studio- and the bars where scalding hot! So I grudgingly left and thought I'd bring them by her house later that night, but it turns out they had not cooked through enough- so back to the oven they went. After a grueling hour and a half of trying to get them to cook I realized I had put in too much lemon juice and the liquid was keeping them from setting up properly! Silly me! But, after some First Aid from my mom, we managed to rectify and deliver them.
This is one of the simplest recipes I've come across and yet it's one that definitely lulled me into a false sense of security! Sooo, if you try these out- because they are FABULOUS when done properly, remember to wear your glasses when reading the ingredient list. ;-)

*Yes, that is Guy Fieri from Food Network, on TV in the background :)*

Isabelle's (Delicious) Lemon Bars
(Yields 12 squares)

Ingredients and Recipe
  • 2 cups flour
  • 1 cup butter
  • 1/2 cup powdered sugar
Mix together. Blind bake at 350 degrees F for 20 minutes.
  • 1 teaspoon lemon zest (1-2 tsp of Meyers)
  • 6 tablespoons lemon juice
  • 1/3 cup flour
  • 2 cups sugar
  • 4 eggs
  • 1 teaspoon baking powder
Mix together and pour on top of crust. Bake for 18 extra minutes. (Can need up to 22-23 however so watch for a golden top and a fork stuck in coming out clean)

Let cool and cut. Dust with powdered sugar before serving.


Happy Baking!
Jessica

Sunday, June 27, 2010

Another weekend flown by

Happy Sunday everyone!

I must say, I had the best day today, you know the kind, where you have a little day trip planned our and then a luxurious amount of time to relax and do whatever you want? That's the one. I went to Carmel today with my family, which is always a lot of fun, and the weather was just gorgeous. :-)

After a bit of a drive, we stopped at Borders. And I have to tell you, I recently picked up Nick Malgieri's book, "The Modern Baker" and have been loving all his explanations for breads and cakes, from which I will soon be posting a recipe. AND finally, I bought the book I have not-so-secretly been coveting for about 5 months, "Baking From My Home to Yours" by Dorie Greenspan. I have read such wonderful things about this book including of course many Tuesday's With Dorie entries, and was patiently waiting for the right Borders coupon to show up in my e-mailbox. So I finally made the leap and bought it, and I can not WAIT to use it! I read Dorie's preface and the first couple of chapter introductions and this woman makes me want to bake every single thing she writes about. From her comments on how to freeze the baked goods to what beverage to serve them with, she inspires me to try all sorts of new things. :-) Basically, I will be pulling from "Baking" a lot throughout the next couple of months.

And now back to my day. ;-) I had a delicious lunch with my mom (while the guys golfed) at our favorite spot, Patisserie Boissiere, and then shopped around at Sur La Table- I seriously could spend hours upon hours in that place and still not feel ready to leave. After picking up just a few things; 2 new baking sheets, cupcake tin liners and a new strainer (which I'm really excited about) we walked around Carmel a bit.

For dinner later we went to Lugano's, a typical Swiss bistro- complete with lederhosen pinned up on the walls along with drawings of cows in fields, and live yodelers who perform every Thursday. (Too bad it was only Sunday!) Fun place, right? :)

The drive home was pretty painless thanks to my dad taking the wheel and now I'm back home ready to start another week of work. Although I did not manage to bake today, I have finally brought my blog completely up to date so I say: tomorrow I'll make two recipes to get back on track! I already know that my mom's fabulous Lemon Bars are on the menu, so we'll see what I come up with to complement those babies.

As always, happy baking and I hope you're ready for a great week!
Jessica

Saturday, June 26, 2010

FRENCH BAGUETTE!!

As I sit here typing this, I am also SAVORING a piece of crusty French baguette, FRESH from the oven! Bread honestly NEVER ceases to amaze me. You take 4 simple ingredients: yeast, water, flour and salt (okay and an egg mixed with a tablespoon of milk for the egg wash) and after mixing and kneading and punching and waiting and punching and waiting and then baking and waiting- you have INCREDIBLE bread! With a little patience and as little as 4 ingredients, you have this amazing delicious piece of heaven. I really suggest you try this recipe, because I'm telling you: there is nothing quite like making your own bread. It's time-consuming, but it's so satisfying to know that you can make something that you have probably bought at the store hundreds of times and maybe never given a second thought to.

Baguette
(From Ultimate Bread by Eric Treuille and Ursula Ferrigno)

Ingredients:
  • 2 1/2 teaspoons dry yeast (I used instant)
  • 1 2/3 cups (375 ml) water
  • 3 1/2 cups (500 g) unbleached flour
  • 1 1/2 teaspoons salt
(For egg wash: Whisk 1 egg and 1 tablespoon milk with a fork)

Directions:
  1. Sprinkle the yeast into 1 1/2 cups (300 ml) of the water in a bowl. Leave for 5 minutes; stir to dissolve. Mix the flour and salt in a large bowl. Make a well in the center and pour in the dissolved yeast.
  2. Use a wooden spoon to draw enough of the flour into the dissolved yeast to form a soft paste. Cover the bowl with a dish towel and let "sponge" until frothy and risen, 20 minutes.
  3. Mix in the flour and add the remaining water, as needed, 1 tablespoon at a time, to form a soft, sticky dough.
  4. Turn out onto a lightly floured surface. Knead until soft, smooth, and supple, about 10 minutes. Try to avoid adding extra flour while kneading the dough.
  5. Put the dough in a clean bowl and cover with a dish towel. Let rise until doubled in size, about 1 1/2 hours.
  6. Punch down, re-cover, and let rise for 45 minutes longer. Punch down again, re-cover, and let rise until doubled in size, about 45 minutes.
  7. Divide the dough into two equal pieces and shape into two baguettes, each about 12 inches in length.Place on a floured baking sheet or in a floured baguette tray; cover with a dish towel. Proof until doubled in size, about 50 minutes.
  8. Cut several diagonal slashes across the top. Paint on the egg wash at this point if you wish to use it, and bake in preheated oven for 20-25 minutes (I baked mine for 22 1/2 minutes), until golden and hollow sounding when tapped underneath. Cool on a wire rack.
So here, if this can convince you to even think about making your own bread, whatever the recipe, I will feel infinitely happy. :-)

Most Happy Baking!!
Jessica

Friday, June 25, 2010

Jessica's Chocolate Chip Cookies

Alas, being Friday, I was really needing a chocolatey pick-me-up after work. Even though I mostly tend to choose recipes for certain people in my life (S'Mores for Ka, Peach and Raspberry Galette for my parents, Ultimate Brownies for Zach...) which I LOVE, I needed chocolate in a bad way.

Since I'd already made chocolate chip cookies not long ago (aka 2 weeks haha) I knew these really needed to be different. So after a bit of research I knew I wanted to make Food Network star Alton Brown's "The Chewy," but with a few twists. :-)
After I mixed up the dough in the afternoon, I stuck them in the fridge while we went out to dinner (Olive Garden- yum!), so they ended up chilling for about 5 hours. When I got home, I hoped that they would succeed and as I scooped out BIG ice-cream scoop cookies, I knew the texture was just right. And on another note, I'm officially patting myself on the back for only having eaten ONE spoonful of cookie dough as I was making them!! A serious accomplishment for myself :-)
I honestly believe these are the best chocolate chip cookies I've ever made, and I'm so excited that they were actually healthier than the average CCC! Even my brother, who NEVER actually vocalizes his praise of my baked goods to ME agreed! So, I hope you will give these a try and that they'll give you that perfect Friday pick-me-up.

Jessica's Chocolate Chip Cookies - Yields 22 big cookies if you don't eat any dough ;-)
(originally adapted from Alton Brown's "The Chewy")
  • 1/2 cup (1 stick) unsalted butter
  • 1/2 cup (1 stick) margarine
  • 1 1/4 cup all-purpose flour
  • 1 cup whole wheat pastry flour (I used Bob's Red Mill)
  • 1 teaspoon salt
  • 1 teaspoon baking soda
  • 3/4 cup white sugar
  • 3/4 cup brown sugar
  • 1 egg
  • 1 egg yolk
  • 2 tablespoons nonfat milk
  • 1 1/2 teaspoons vanilla extract
  • 2 cups semisweet chocolate chips
Ingredients:
  1. Melt the butter and margarine in a bowl in the microwave.
  2. Sift together the flour, baking soda, salt and set aside.
  3. Pour the melted butter in a large bowl and add sugars. Cream together on low speed.
  4. Add the egg, egg yolk, milk and vanilla extract and mix until well combined. (Make sure butter isn't too hot or it will cook the egg)
  5. Fold flour mixture into batter in thirds, using a spatula.
  6. Stir in the chocolate chips.
  7. Refrigerate the dough for 5 hours, overnight is even better.
  8. When refrigeration time is done, preheat oven to 375 degrees F while you scoop out ice-cream scoop sized cookies onto a parchment-lined baking sheet.
  9. Bake for 14 minutes, or until golden brown on top.
  10. Cool for about an hour and store in an airtight container, but make sure you try at least ONE about 5 minutes after removing from the oven-YUM!
Happy Baking!
Jessica

Twist on a FANTASTIC bar :)

All week, I'd been truing to come up with a recipe to bring to work on Friday to share with my coworkers and somehow I was just not getting inspired. So frustrating, until I realized that it was because I was still stuck on the Apricot Oat Bars I made on Monday. They were exactly what I wanted to share with my team, but I simply couldn't justify making the exact same thing again- so on my drive home I brainstormed different fruits I could try. But, it wasn't until stepping into my friendly grocer's produce aisle that I knew I had to use blackberries. Those berries were staring me down from the moment I stepped in the store- so I picked up a little box of them and then grabbed a bottle of Smuckers Simply Fruit Blackberry Preserves, and I was good to go.
If you want a sweet little treat to share that's not actually TOO unhealthy, give these a try or choose a different fruit and let me know how it works out for you!

Happy Baking!
Jessica

Wednesday, June 23, 2010

What a day... Or two?

Oh jeez! What an intense few days! I started work this week and I'm having a little trouble getting used to getting up early again! And I am definitely an early riser, even on the weekend I can hardly sleep in past 8:30! But getting up at 6:30 and needing to be fully functional is another story. ;-) Anyways, when I got home from work yesterday around 5 I was feeling all out of whack so I didn't get a chance to bake! BUT, I did manage to whip together a crust for today's Galette that I knew would need refrigeration time. So.... I didn't really cheat, right?
Anywho, I thought about this Galette all day and how I was going to adapt it to my own fruit choices. So, after debating between Alice Medrich's Rustic Plum Tart recipe and Smitten Kitchen's Nectarine Galette, I chose the galette because of the intriguing almond layer she included beneath the fruit.
So, here is my take on a Rustic Peach and Raspberry Galette, I hope you enjoy it!


Happy Baking!
Jessica

Monday, June 21, 2010

First day of work and Giada's Apricot Oat Bars!

Hi everyone!

I apologize for the past few posts' shortness, but I've been so busy trying to cram in the last few moments of summer fun before work began! And what a last hurrah it was!
I have baked so much in the last week and a half but I am having so much fun, coming home and being able to bake anything of my choosing is so relaxing and having the chance to balance it out between the SUPER sweet (yep, I'm talking to you S'Mores Brownies!!) to the scrumptious and savory Challah. (Did I just use alliteration over summer break?)
Anyways, back to the reason for this post! I had my first day of work today at a technology company (Sorry, can't disclose the name!) as a marketing intern. Today was mostly orientation presentations and a REALLY long training session for a program I already know... So as I'm sure you can imagine, I was seriously ready for a little R and R, and on the drive home I thought of the perfect dessert. I saw it on the Food Network about 2 weeks ago and knew I had to wait for the perfect occasion to make it. Giada de Laurentiis is honestly one of my favorite people ever. Between Giada and Ina Garten (The Barefoot Contessa), I think I would never have another boring conversation. She just seems so normal and down to earth! We'd be besties- I know it. :) So, in the spirit of sharing my love for my foodie idol, here's the recipe. These bars are chewy and moist throughout with just the right amount of crunch from the nuts! I am ESPECIALLY glad I halved this recipe because after watching all the sugar that was mixed into it and the AMAZING taste-I would absolutely gain 10 pounds if the full recipe had been in my kitchen. Be careful- these are crazy good.

Apricot Oat Bars (full recipe)
(adapted from Giada de Laurentiis)

Ingredients
  • 13 ounces apricot preserves
  • 8 dried apricots, chopped into 1/4 in. pieces (I kept the full 8 to add more authentic apricot chewiness!)
  • 1 3/4 cup all-purpose flour
  • 1 packed cup light brown sugar
  • 1 teaspoon ground cinnamon (I left this out- not a big cinnamon fan)
  • 3/4 teaspoon fine sea salt (table salt is fine too)
  • 3/4 teaspoon baking soda
  • 1 3/4 cups old-fashioned oats
  • 1 cup (4 ounces) coursely chopped walnuts (I only had pecans on hand so I used those and they worked just as well)
  • 1 cup (2 sticks) unsalted butter, melted
  • 1 egg, at room temperature, beaten
  • 1 teaspoon vanilla extract (I left the whole teaspoon in my halved version)

Directions

  1. Put an oven rack in the center of the oven. Preheat the oven to 350 degrees F. Spray a 9x13 by 2-inch metal baking dish with vegetable oil cooking spray. (Or butter) Line the bottom and sides of the pan with parchment paper. Spray the parchment paper with vegetable oil cooking spray and set aside.
  2. Filling: In a small bowl, mix together the preserves and the apricots. Set aside.
  3. Crust: In a large bowl, whisk together the flour, sugar, cinnamon, salt and baking soda. Stir in the oats and walnuts. Add the butter, egg and vanilla and stir until incorporated.
  4. Using a fork or clean fingers, lightly press half of the crust mixture onto the bottom of the prepared pan. Using a spatula, spread the filling over the crust leaving a 1/2-inch border around the edge of the pan. Cover the filling with the remaining crust mixture and gently press to flatten. Bake until golden, about 30 to 35 minutes. Cool for 1 hour. (This is the REALLY hard part!) Cut into bars and store in an airtight container for up to 3 days.

Hopefully you'll give these a try and share my love for Giada and her yummy bars. :)


Happy Baking!

Jessica

Sunday, June 20, 2010

Cranberry-Orange Scones and the Hike from Hell!!

What a day! This morning I made some yummy and light cranberry-orange scones, with whole wheat pastry flour that happen to be a perfect snack. BUT, right after baking them my mom and I decided to go on a hike. We really enjoy hiking and try to challenge ourselves a little more each time we go, so we were planning on a 4-5 mile hike. Sounds reasonable right?
Well, when we got there I took charge of the map and decided we should try to do the 5 mile hike... which started by going uphill. Fine right?
About an hour into our hike and a few twists and turns later, we realized we were NOT on the hike we had planned! We were actually on a 7.5 mile hike- and hour and a half, 4 miles if you will, going uphill nonstop!!!

So, we ended up doing a 3 hour long hike, in the middle of the day, with only 1 bottle of H2O each! But you know what? We did accomplish it! And I don't know how soon we'll be looking to repeat it.... but at least we made it through! :-)

And now, have a scone recipe!

Cranberry-Orange Scones
(adapted from King Arthur Flour)

Ingredients:
  • 1 3/4 cup whole wheat pastry flour
  • 2 tablespoons sugar
  • 2 1/2 teaspoons baking powder
  • 1/2 teaspoon salt
  • 5 tablespoons unsalted butter, chilled, cut into pieces
  • 1/2 cup dried cranberries
  • 1/3 cup nonfat milk
  • 1 tablespoon orange juice (I used pulp-less)
  • 1 large egg
  • the grated peel of 1 medium-to-large orange
Directions:
  1. Preheat the oven to 425 degrees F. Line a baking sheet with parchment paper.
  2. In a medium-sized mixing bowl, sift together the dry ingredients, then add the butter, rubbing it in till the mixture resembles coarse meal.
  3. Stir in the cranberries.
  4. In a separate bowl, whisk together the milk, orange juice, egg and orang peel. Add this mixture to the flour mixture and stir till the dough just comes together.
  5. Scoop out globs of dough and drop onto the baking sheet. (Or you can use the authentic triangle scone technique, but I like the rustic look of the drop-scone)
  6. Bake the scones for about 15 minutes or until they're golden-brown. Remove them from the oven and serve immediately.
Happy Baking!
Jessica

Saturday, June 19, 2010

Miss Paula Deen's Very Own Biscuits!

Today I made biscuits! In a bit of a rush so I can't write any more right now, but after the EXTREME decadence of the s'mores brownies I needed something to counter-act the sugar rush. For the recipe, I called upon the lovely Paula Deen because really- who better to make biscuits than the Southern Queen herself?
When I made these I think I rolled out the dough a little too much so the biscuits stayed a bit flat, but still moist and delicious. So, if thicker biscuits are more your thing, roll them out to about 1/2 inch thickness. Enjoy!

Paula Deen's Basic Biscuits
Recipe from The Lady and Sons Savannah Country Cookbook

Ingredients:
  • 1/2 package yeast
  • 1/4 cup lukewarm water
  • 2 1/2 cups all-purpose flour
  • 1/2 teaspoon baking soda
  • 1/2 teaspoon salt
  • 1/2 tablespoon baking powder
  • 1 tablespoon sugar
  • 3/8 cup shortening
  • 1 cup buttermilk
Directions:
  1. Preheat oven to 400 degrees F.
  2. Dissolve yeast and set aside. (about 5 minutes)
  3. Mix together flour, baking soda, salt, baking powder, and sugar.
  4. Cut shortening into the dry ingredients.
  5. Mix in yeast and buttermilk.
  6. On a lightly floured surface, roll out the dough to desired thickness.
  7. Cut out with a biscuit cutter. (I used a pizza cutter)
  8. Place biscuits on a greased/sprayed baking sheet and bake for about 12 minutes.
Yields about 1 1/2 dozen biscuits.

Happy Baking!
Jessica

Friday, June 18, 2010

S'Mores Brownies: get your napkins ready!

This post goes out to my best friend, Ka, and his absurd sweet tooth! I don't think I know a lot of people that would be able to stomach all the sugary baked goods I force-feed him ;-) And, the great thing about Ka is that he's really honest in his feedback about my concoctions. So, when I landed on this insane recipe, (after LONG searches to replicate my friend Danielle's fantastic version) I knew no one but him would be able to full appreciate the sugar overload.
These are S'More Brownies. Otherwise known as Crack Brownies. Part marshmallow, part brownie and part buttery graham cracker crust. Yes, these are legal in the United States, despite being lethal to a healthy diet. :)
S'More Brownies
(from Laura at Tastebook.com)

Ingredients:
  • 6 tablespoons unsalted butter, melted
  • 1 1/2 ups graham cracker crumbs
  • 2 tablespoons sugar
  • Pinch fine salt
Brownie

  • 8 tablespoons (1 stick) unsalted butter
  • 4 ounces unsweetened chopped chocolate
  • 1 cup light brown sugar
  • 3/4 cup white sugar
  • 1 1/2 teaspoons vanilla extract
  • 1/2 teaspoon fine salt
  • 4 large cold eggs
  • 1 cup all-purpose flour
  • 4 cups large marshmallows
Directions:
  1. Position a rackk in the lower third of the oven and preheat to 325 degrees F. Line an 8x8 inch square baking pan with foil (or parchment paper) so it hangs over the edges by about 1 inch.
  2. For the crust: Lightly butter the foil with some of the melted butter. Stir the rest of the butter together with the crumbs, sugar and salt in a medium bowl. Press the crumb mixture evenly over the bottom of the pan. Bake until golden brown, about 20 minutes.
  3. Meanwhile, make the brownie. Put the butter and chocolate in a medium microwaveable bowl. Melt in the microwave on 75% power for 2 minutes. Stir, and microwave again until completely melted, about 2 minutes more (You could also use the double-boiler method if you prefer). Stir the sugars, vanilla and salt into the melted chocolate. Add the eggs and beat vigorously to make a thick and glossy batter. Add the flour and stir until just incorporated.
  4. Pour batter into the prepared pan. Bake until the top is crispy and a toothpick inserted into the middle comes out mostly clean, with a few crumbs, about 40 to 45 minutes.
  5. Remove from the oven and carefully position a rack about 6 inches from the broiler and preheat on low. Layer marshmallows across the top and toast under the broiler until golden, about 2 minutes (Keep an eye on it, they go REALLY quick!). Cool on a rack, gently removing the brownies from the pan using the aluminum flaps. Carefully separate any marshmallow from the foil and fold away. Cut into 12 (2-inch) squares. Take your time, these are pretty messy!
So go ahead, (if you feel up to the challenge of controlling yourself from eating them all!) and give these a try. Make them for someone special in your life, and I guarantee they will feel the love. :-)

Happy Baking!
Jessica

Thursday, June 17, 2010

Doomed Strawberry Charlotte....

This is a warning post. Unfortunately, today's recipe was just a disaster all around. Going through my mom's old recipe book over the weekend I was so excited to see a recipe for a low-fat Strawberry Charlotte! (Which is a French dessert, kind of like a jello surrounded by a layer of cookies and refrigerated for a few hours) Hmph.... This was just not a success.
First, the recipe calls for Lady Finger cookies- of which every store near my house was out of! So I did my googling thing and decided on Angel Food Cake as a suitable substitute- nope, it was much too soft and sticky and sweet to work with the charlotte sauce. Finally, the kicker was that the recipe didn't call for gelatin.... So it never came together. I feel a bit ashamed showing you a picture, but here it is. Hopefully tomorrow will be better! :-)

Happy Baking, tomorrow!
Jessica

Wednesday, June 16, 2010

First Time Making Bread....Success!!

Today was the day. I've been obsessed with bread throughout my entire life but I hadn't truly fallen in love until I got to UCLA and tried Challah through Challah for Hunger. It's a wonderful organization through the Hillel house on campus that fundraises to send money to refugees among others, in the Democratic Republic of Congo and Darfur, by baking and selling challah bread on campus every Thursday.
I was SO excited when my bread actually rose!!

This bread has changed my life- it is THAT good!! I look forward
to it every week and one of my friends Lea is equally obsessed, so we support each other throughout the long week until we can delight in challah. :-)
So when I came home I knew I needed to replicate the recipe. Although this isn't exactly the challah I have grown to love at school, this made a delicious braided loaf that tastes even better the next day as an afternoon snack, toasted and buttered.
I hope you enjoy it as much as I do!

Ingredients:
  • 3/4 cup hot milk
  • 1/4 cup butter
  • 1/2 teaspoon salt
  • 1/4 cup sugar
  • 1 envelope of yeast
  • 1/4 cup warm water
  • 1 beaten egg
  • about 4 1/4 cups flour (can use up to 4 1/2)
Directions:
  1. Heat the milk until it's steaming hot, but not boiling. Then pour the hot milk over the first three ingredients, the butter, salt and sugar. Use large mixing bowl. Stir this to melt the butter, then set aside to cool.
  2. Measure 1/4 cup warm water and stir the yeast into it. (Not too hot, or you'll kill theyeast!) Let yeast stand and begin to grow, about 5 minutes.
  3. Beat the eggs in a cup, with a fork, then pour them into the milk mixture, which must not be hot but can be warm.
  4. Add the yeast mixture to the milk mixture and stir everything until well blended.
  5. Now you begin to add the flour, about a cup at a time, stirring it until smooth, then adding another cup.
  6. Once dough cannot absorb any more flour (this may vary), knead the dough for a couple of minutes on a floured counter or board and then put it back into the mixing bowl. Cover and let if rise.
  7. In a comfortably warm kitchen, the dough should have risen in about three quarters of an hour.
  8. Preheat the oven to 350 degrees F.
  9. Punch the dough down, remove from the bowl, form into a ball, roll into a cylinder shape and put in a greased and floured loaf pan. Cover and let rise again, for about 30 more minutes. *You can also look up how to braid the loaf if you so desire at http://hubpages.com/hub/easy-prize-winning-homemade-bread, which I learned to do earlier this year at school :)*
  10. Bake at 350 degrees F for about 40-45 minutes, until nice and golden.
**I also made a quick little egg wash using an egg white and painted it onto my challah before baking, but there are many variations on this wash, and next time I would add a little milk to the egg to make it even prettier. :)*

Happy Baking!
Jessica

Tuesday, June 15, 2010

Let him eat cake: Ultimate Double Chocolate Brownies

This morning I got up at 5 am. Yes, I know it's the summer. Yes, I know it's ridiculous. But hear me out. My brother had a golf tournament today about 2 hours away and since I've been gone at school all year I really haven't had the chance to see him play in a while, so I jumped at the opportunity. I got to watch him play most of his round, but unfortunately he didn't qet qualified to go on to the next level, so I knew I had to make his favorite dessert once we got home to make up for it.... just a little bit. 
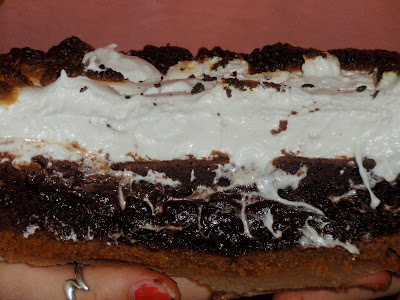
And that's where these brownies come in. (Unfortunately, I got a little over-excited about them and started cutting before I could get a good picture in!) I discovered them over Memorial Day weekend when I came home and needed a chocolate fix and they've become his favorites- and have absolutely nothing to do with those boxed mixes he's been settling for, for years. Sorry, Betty Crocker!
So here you are, a decadent and chewy-on-the-inside and slightly-cakey-on-the-outside brownie, that's perfect after a long day of golfing in the hot sun. :)

Ultimate Double Chocolate Brownies
-BakeorBreak, originally Martha Stewart
6 tablespoons unsalted butter
6 oz coarsely chopped good-quality semisweet chocolate (I used Ghirardelli)
1/4 cup unsweeted cocoa powder (not Dutch-process)
3/4 cup all-purpose flour (I actually used whole wheat pastry flour- and no one noticed a difference!)
1/4 teaspoon baking powder
1/4 teaspoon salt
1 cup sugar
2 large eggs
2 teaspoons pure vanilla extract
  1. Preheat oven to 350 degrees F. Line a buttered 8-inch square baking pan with foil or parchment paper, allowing 2 inches to hang over sides. Butter lining (excluding overhang); set pan aside.
  2. Put butter, chocolate and cocoa in a heatproof medium bowl and microwave for 1-2 minutes stirring every 30 seconds until butter and chocolate are melted. Let cool slightly.
  3. Whisk together flour, baking powder, and salt in a separate bowl; set aside.
  4. Put sugar, eggs and canilla in the bowl of an electric mixer fitted with the whisk attachment, and beat on medium speed until pale, about 4 minutes. Add chocolate mixture; beat until combined. Add flour mixture; beat, scraping down sides of bowl, until well incorporated. (This will be a THICK mixture- do not worry that it's not as creamy as some other brownie batters)
  5. Pour batter into prepared pan; smooth top with a rubber spatula. Bake until a cake tester inserted into brownies (avoid center and edges) comes out with a few crumbs but is not wet, about 35 minutes. Let cool slightly in pan, about 15 minutes. Life outbrownies; let cool completely on a wire rack before cutting into squares.

Happy Baking!

Jessica